Concrete Driveways Gallery
Concrete Driveways
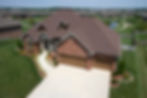
Wichita Concrete Driveway Replacement

Concrete Driveway Replacement

Concrete Driveway
Wichita Concrete Driveway Replacement
316-223-7296
Concrete Driveway Contractor Wichita
If you are building a new driveway or replacing your old concrete driveway in Wichita, KS, you want to ensure that your concrete driveway will look good for many years to come.
There are important steps your contractor should follow during installation. How well your driveway looks and performs long-term is largely related to the quality of workmanship and materials that go into it. To help ensure a problem-free driveway contact Wichita Concrete today for a Free Estimate!
In both soil composition and compaction, the key to a good concrete sub-grade, is one that will provide adequate support, ensure an even slab thickness, and prevent slab settlement and structural cracking. Soft spots should be removed and replaced with good material, such as gravel or crushed rock. Many western states have expansive soils. In these conditions, 2 to 8 inches of crushed rock should be used as sub-grade material, depending on the degree of expansiveness.
Don't allow the concrete to be placed on bone-dry sub-grade. Spraying the sub-grade first with water to dampen it will prevent it from wicking water from the fresh concrete. Next we want to compact the sub-grade material to prep for the concrete ready-mix pour. Vibratory plate compactors and rammers are the most common machines used for sub-grade compaction of residential driveways.
The Concrete Ready-mix:
Mix design will impact the performance and longevity of a concrete driveway.
Concrete Control Joints:
Driveway control joints can be incorporated into a decorative pattern.
Correctly placed concrete control joints:
To help prevent random cracking, control joints should be placed at a maximum spacing of 10 feet for a 4-inch-thick driveway slab. While random cracks are generally not a structural problem and will not reduce the service life of the driveway, they can be an eyesore. Also avoid joint patterns that produce rectangular or triangular sections. The depth of control joints is also critical. Your concrete installer should hand tool or saw-cut them to a depth equaling one-fourth the slab thickness (or 1 inch for a 4-inch slab).
In addition to control joints, an isolation joint should be installed where the driveway meets a sidewalk, garage floor slab, and other existing pavements. Ask your contractor to provide a jointing plan as part of his written proposal.
Reinforcement:
Using steel reinforcement will provide additional structural capacity for your driveway and is especially important if the concrete slab will be exposed to heavy traffic. Reinforcement won't prevent cracks, but it will help hold them together if they do occur. Reinforcement can be either wire mesh or ½-inch (#4) steel re-bar placed in a grid pattern with a spacing between bars of approximately 12 inches. In either case, blocks should be used under the reinforcement to keep centered within the concrete.
Placing concrete at the proper thickness
Concrete thickness is the major factor (even more than the strength of the concrete) in determining a driveway's structural capacity. Place concrete at a minimum thickness of 4 inches. Increasing the thickness from 4 inches to 5 inches will add approximately 20% to your concrete cost, but will also boost your driveway's load-carrying capacity nearly 50%. Also, consider thickening the edges of the driveway by 1 or 2 inches to provide additional structural support in the area most likely to be subject to heavy loading, with the thickened section extending in from the slab edge 4 to 8 inches.
Proper finishing:
The biggest mistakes that occur during the finishing of concrete driveways are overworking the surface and performing finishing operations while bleed-water is present.
Finishing a concrete driveway is generally a three-step process.
- Level or strike off the concrete with a screed to achieve a uniform surface.
- Float the concrete with a wood or magnesium bull-float before bleed-water accumulates.
- Apply a simple broom finish to improve traction-unless plans call for stamping the driveway or applying another type of decorative textured finish.
Final finishing with a steel trowel is unnecessary and can actually do more harm than good by sealing the concrete surface prematurely and preventing the evaporation of bleed-water.
Proper drainage:
To eliminate standing water on your driveway, it should be sloped toward the street and away from existing structures (such as your house and garage) a minimum of 1/8 inch per foot. If proper drainage is prevented because the concrete slab is wedged between two structures, you may need to install a drain that will collect the water at a low point in the concrete and divert it away.
Proper curing techniques:
Cure the concrete as soon as finishing is completed. Curing of the concrete is the final step of the process, and one of the most important. Unfortunately, it's also one of the most neglected. In extreme cases, failure to cure the concrete immediately after final finishing can result in strength reductions of up to 50% by reducing the concrete's resistance to the effects of weather and increasing the possibility of surface defects.
Methods of curing include covering the concrete with plastic sheets or wet curing blankets, continuous sprinkling, and application of a liquid membrane-forming curing compound. For slabs that are to be acid stained, wet curing is the best approach, since a curing compound would have to be completely removed to allow the acid stain to penetrate. The most common way to cure plain or integrally colored concrete, though, is to use a liquid curing compound.
If you are ready to move forward with you concrete driveway replacement or extension please contact Wichita Concrete today!